Are you planning to install a shed in your backyard? If so, one of the most important steps is to create a solid foundation. A gravel pad is an excellent option that offers durability, cost-effectiveness, and easy installation. In this guide, we will walk you through the process of leveling a gravel pad, from preparation to installation. By following these steps and implementing the best practices, you can ensure a stable and even surface for your shed.
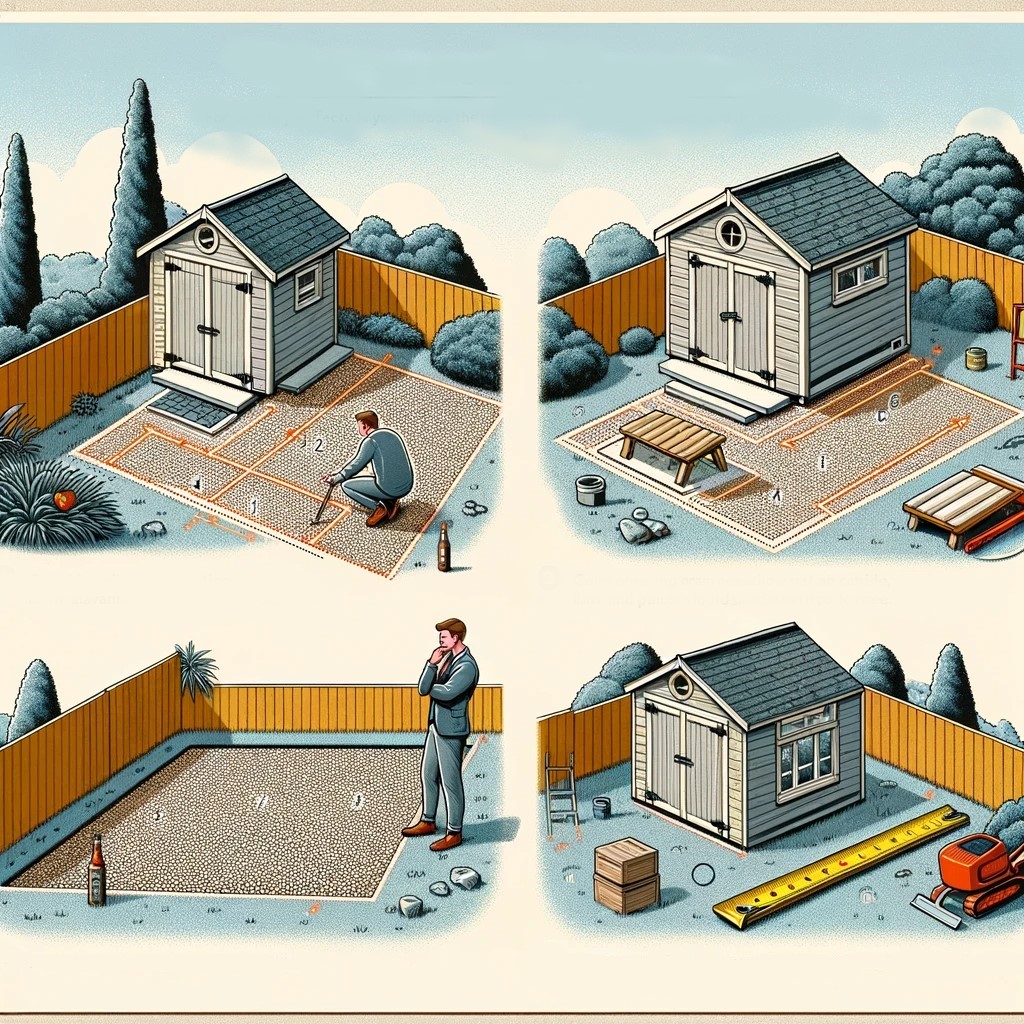
When it comes to building a sturdy and durable shed, choosing the right location for your gravel shed foundation is crucial. The site selection process involves several important considerations to ensure optimal stability and functionality.
First and foremost, it’s essential to check with your local government for any permits and regulations that may apply to your shed location. Compliance with local ordinances, setback requirements, and footprint regulations is vital to avoid any legal issues down the line.
Additionally, you’ll want to steer clear of swampy areas and steep grades, as they can compromise the stability of your shed. It’s also important to be aware of utility lines and underground structures to prevent any potential accidents or damage during the installation process.
Furthermore, considering accessibility, sun exposure, and aesthetic appeal is essential. You want your shed to be easily accessible and conveniently located, while also ensuring it receives adequate sunlight throughout the day. By carefully evaluating these site selection criteria, you can choose the perfect location for your gravel shed foundation.
| Considerations for Shed Location |
|---|
| Check local permits and regulations |
| Avoid swampy areas and steep grades |
| Be aware of utility lines and underground structures |
| Ensure good drainage and firm ground |
Consider accessibility, sun exposure, and aesthetics |
By following these guidelines, you can ensure that your shed is built on a solid foundation that will withstand the test of time. The next step in the process is to dive into the detailed steps for installing your gravel shed foundation, which we’ll explore in the next section.
Installing a gravel shed foundation is a straightforward process that can be completed with a few simple steps. By following these guidelines, you’ll be able to create a stable and level surface for your shed.
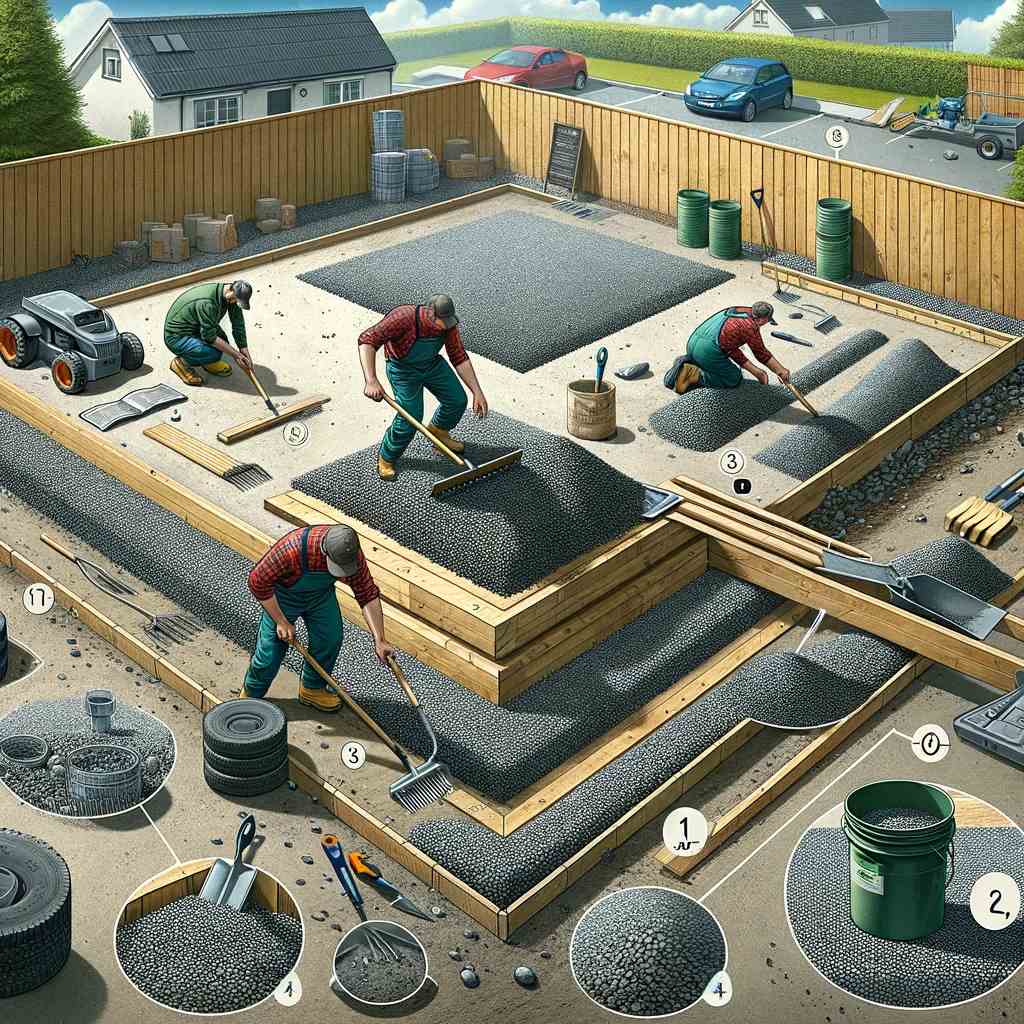
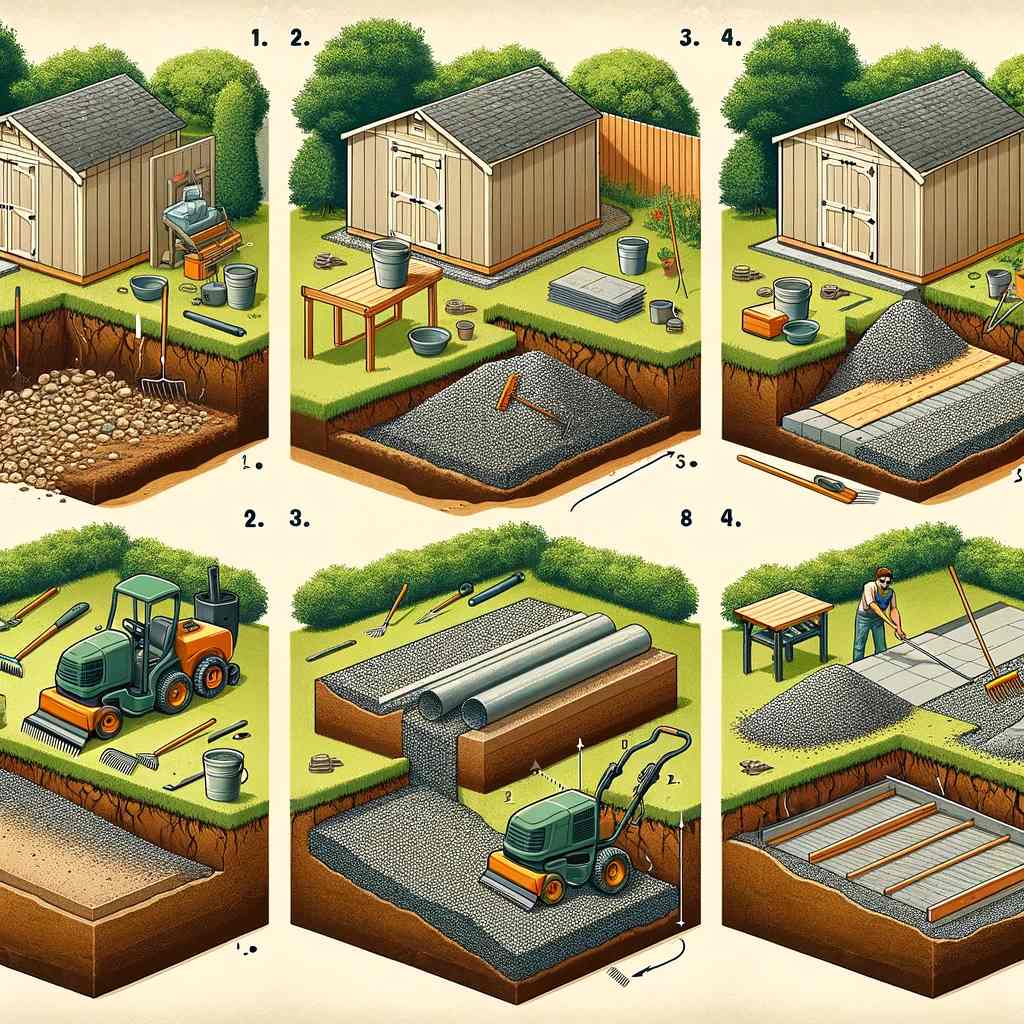
Collect all the necessary tools and materials for the installation process. This includes a tape measure, marking paint, level, sledgehammer, circular saw, rake, tamper, shovel, staple gun or hammer tacker, string, mallet, and safety gear. Having these tools on hand will make the process smoother and more efficient.
Using stakes, string lines, and a level, square and stake the corners of your foundation area. This will help you ensure that the shed is properly aligned and level. Accuracy at this stage is vital for the overall stability and appearance of your shed.
Start excavating the foundation area, removing any surface debris, topsoil, subsoil, rocks, and roots. Use a 2×4 and level to ensure the site is properly leveled. This step is crucial for achieving a sturdy and even gravel pad.
Lay the gravel base using crushed stone with angular edges. This type of gravel provides improved stability and drainage. Consider using a weed barrier or stabilization fabric to prevent weed growth and maintain the longevity of your foundation. Additionally, use concrete blocks for weight-bearing points to further enhance the stability of the shed.
Using a tamper or plate compactor, compact the gravel to ensure maximum stability. This step will help to eliminate any voids and create a solid surface for your shed.
Verify the levelness of the gravel foundation using a level. Make any necessary adjustments to achieve a perfectly level surface.
With the gravel foundation properly installed and leveled, you’re now ready to proceed with the construction of your shed. Follow the manufacturer’s instructions and use the appropriate building techniques to ensure a successful and durable shed.
By following these steps, you’ll be able to install a gravel shed foundation that provides the necessary stability, drainage, and support for your shed.
With a gravel shed foundation in place, you can have peace of mind knowing that your shed is well-supported and protected from potential problems caused by uneven ground or inadequate drainage.
A gravel pad is an excellent choice for leveling a shed foundation due to its affordability, durability, and drainage properties. By following the step-by-step process, you can ensure a stable and even surface for your shed.
Proper site selection is vital in creating a solid foundation. Take into account factors such as topography, drainage, and accessibility when choosing the location for your gravel pad.
With the right tools and materials, including a tape measure, level, rake, and tamper, you can successfully install a gravel pad. Remember to compact the gravel base and check the level for optimal stability.
In conclusion, by mastering the basics of gravel pad leveling, you can improve your DIY skills and create a reliable foundation that will support your shed for years to come.
Gravel shed foundations are economical, durable, and simple to install. They provide better drainage and support the shed evenly.
Factors to consider include topography, utility lines, local ordinances, accessibility, and aesthetics. Proper site selection is crucial for good drainage and stability.
You will need a tape measure, marking paint, level, sledgehammer, circular saw, rake, tamper, shovel, staple gun/hammer tacker, string, mallet, and safety gear.
Consider checking with your local government for permits and regulations, avoiding swampy areas and steep grades, being aware of utility lines and underground structures, and considering accessibility, sun exposure, and aesthetic appeal.
Research local ordinances, setback requirements, and footprint regulations to ensure compliance. You may also need to obtain permits for your shed.
Before starting, check with utility companies to mark underground lines and avoid potential hazards. Safety should always be a priority.
The steps include selecting the site, gathering supplies, staking the corners, excavating the area, leveling the site, installing the gravel base, compacting the gravel, checking the level, and building the shed on the foundation.
Proper site selection ensures good drainage and stability, which are crucial for the longevity of your shed.
By mastering the basics of gravel pad leveling and following the step-by-step installation process, you can create a sturdy, even surface for your shed.